
Kenmore Model 790 Oven Manual Overview
The Kenmore 790 manual is a comprehensive guide․ It outlines essential oven controls, safety instructions, installation, and maintenance tips․ Users gain insights into diverse cooking functions, including bake, broil, convection, for optimal appliance operation․
Accessing Specific Kenmore 790 Model Manuals
To effectively utilize your Kenmore 790 oven, locating the specific model manual is paramount․ These comprehensive guides, often titled “Use & Care Manual” or “User Manual,” provide crucial information tailored to your appliance’s precise configuration․ Kenmore offers numerous models within the 790 series, including examples like 790․3017, 790․7936, 790․7050, 790․4660, and 790․4906; each requires its distinct document․ Identifying your exact model number, typically found on a label near the oven door, is the critical first step in your search process․
Accessing these essential documents primarily involves an online search․ Users are strongly advised to input their oven’s full model number to retrieve the precisely correct version․ Reputable online libraries, dedicated appliance manual repositories, and manufacturer support pages are key sources․ Many are readily available for direct download in various digital formats, such as PDF or EPUB, facilitating convenient access․ For instance, you might find a “Kenmore 790 Stove User Manual” or a specific “Kenmore_ELECTRIC_RANGE_790․4660_Oven_User_Manual” within these online collections․ These archives meticulously categorize manuals by brand and model, ensuring that the correct user instructions for your particular Kenmore 790 appliance are easily obtainable․

Essential Safety Instructions
Adhering to essential safety instructions is paramount for the safe operation of your Kenmore 790 oven․ Always consult your specific model’s Use & Care Manual before initial use and for ongoing guidance․ This documentation, readily available online, details critical precautions to prevent accidents and ensure long-term reliability; Never leave children unattended near the appliance, as surfaces can become extremely hot during and after operation․ Use oven mitts or pot holders when handling hot cookware or accessing the oven interior to avoid burns․ Keep flammable materials, such as paper towels, plastic items, or aerosols, away from the cooktop and oven vents․ In the event of a grease fire, never use water; instead, smother the flames with a lid or use a dry chemical extinguisher․ Ensure adequate ventilation in your kitchen, especially when using gas models, to prevent carbon monoxide buildup․ Do not store items within the oven cavity that are not intended for cooking, particularly plastics or combustible materials․ Regular cleaning helps prevent the accumulation of grease, which can be a fire hazard․ If you suspect a gas leak, immediately shut off the gas supply and ventilate the area, then contact a qualified technician․ Avoid attempting unauthorized repairs or modifications to the appliance, as this can compromise safety and void warranties․ Always ensure the oven door is fully closed during operation to maintain proper temperature and prevent heat escape․ Following these guidelines ensures a safe and efficient cooking experience with your Kenmore 790 oven․

Understanding Oven Controls and Features
The Kenmore 790 oven features a user-friendly control panel and display․ Users can easily manage settings for bake, timed bake, and other cooking functions․ Indicator lights provide operational status, while various buttons allow precise temperature and mode adjustments for diverse culinary needs․
Oven Display and Indicator Lights
The Kenmore Model 790 oven incorporates a clear and user-friendly digital display, acting as the central hub for all operational feedback and precise user input․ This display illuminates critical information, allowing owners to effortlessly monitor cooking progress, selected settings, and active functions․ It vividly shows the current oven temperature, remaining time for timed bake functions, or the active minute timer countdown․ This visual interface is absolutely crucial for precision cooking, ensuring users are always well-informed about the oven’s current status and can manage cooking cycles effectively and with confidence․
Complementing this essential digital display are various indicator lights, each specifically designed to communicate distinct operational states․ For instance, a dedicated light will signal clearly when the oven is actively preheating, typically remaining illuminated until the desired set temperature is fully achieved․ Other indicator lights may visually communicate when a surface burner is engaged, the oven door is securely locked during a self-cleaning cycle, or if the convenient warmer drawer feature is currently activated․ Understanding these distinct indicator lights is paramount for truly safe and highly efficient operation, as they provide immediate visual confirmation of all activated features and processes․ The user manual meticulously details the meaning of each individual light, thoroughly guiding users through every specific function and significantly aiding in any necessary troubleshooting endeavors․
Surface Burner and Cooktop Operation
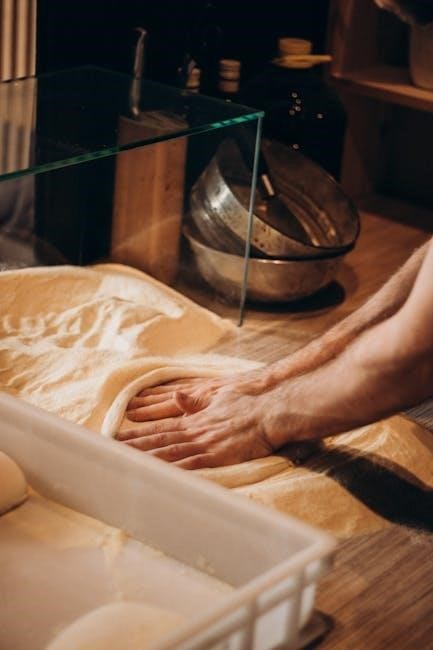
The Kenmore Model 790 oven manual provides detailed instructions for the effective operation of its surface burners and cooktop․ Users can easily activate and control the heat settings for each individual surface burner using dedicated control knobs located on the appliance’s front panel․ To ignite a burner, simply press and turn the corresponding knob to the “Lite” position, then continue to rotate it to the desired heat level, from low simmer to high heat․ The cooktop is designed for versatility, accommodating various pot and pan sizes for diverse cooking needs․ Proper use ensures efficient heat distribution for everything from gentle simmering to rapid boiling․ It is crucial to always use cookware appropriate for the burner size to maximize efficiency and minimize potential hazards․ The indicator lights associated with the surface burners provide visual confirmation when a burner is active, enhancing safety and ease of use․ The manual emphasizes the importance of adjusting the flame (for gas models) or heat element (for electric models) precisely to match cooking requirements․ Always ensure the burner is completely off when cooking is complete․ This comprehensive section ensures users can confidently manage all stovetop cooking tasks, promoting safe and enjoyable culinary experiences daily․
Warmer Drawer and Slow Cook Features
The Kenmore Model 790 oven manual details the convenient warmer drawer and innovative slow cook features, enhancing culinary flexibility; The warmer drawer, often located beneath the oven cavity, is designed to keep cooked foods at serving temperature without further cooking or drying them out․ This feature is invaluable for meal preparation, allowing dishes to be held warm while other components are being finished․ To operate, simply place the cooked food in the drawer and select the appropriate temperature setting, usually low, medium, or high, according to the manual’s guidance․ This ensures your meal is perfectly warm when ready to serve, preventing cold food complaints․
Furthermore, the Kenmore 790 often incorporates a slow cook function within its main oven controls․ This specialized setting allows for extended cooking times at lower, consistent temperatures, ideal for tenderizing meats, stews, and casseroles․ By selecting the slow cook feature on the oven display, users can transform tough cuts of meat into succulent dishes with minimal effort․ The manual will guide you through setting the specific temperature and duration for this mode, often recommending settings similar to those of a standalone slow cooker․ This integrated feature saves counter space and provides consistent, controlled heat for delicious, slow-cooked meals, offering ultimate convenience․ Both features highlight the appliance’s versatility․

Installation and Setup Guidelines
Proper installation of the Kenmore 790 oven is crucial for safety and performance․ Follow detailed guidelines for gas line installation requirements and correct burner cap placement․ These instructions ensure efficient operation and prevent potential issues, guaranteeing a reliable setup for your new appliance․
Gas Line Installation Requirements
Proper gas line installation is paramount for the safe and efficient operation of your Kenmore Model 790 oven․ It is strongly recommended that a qualified professional, such as a licensed plumber or gas fitter, performs all gas connections to ensure compliance with local codes and national standards․ Before commencing installation, verify that the gas supply pressure meets the specifications outlined in your manual․ An inadequate or excessive gas supply can compromise performance and safety․ The gas line must be adequately sized to provide sufficient fuel to the appliance․ Install an accessible manual shut-off valve in the gas line ahead of the oven for safety and maintenance purposes, allowing for quick isolation of the gas supply․ All connections must be made using approved materials and methods, including thread sealant suitable for gas․ After connecting the oven to the gas supply, it is critical to perform a thorough leak test using a non-corrosive leak detection solution to identify and rectify any potential leaks immediately․ Never use an open flame to check for gas leaks․ Ensure proper ventilation during and after installation․ Adherence to these guidelines prevents hazards, ensures optimal oven functionality, and maintains the manufacturer’s warranty․ Refer to the specific diagrams and instructions within your Kenmore 790 manual for precise details tailored to your model․
Burner Cap Placement and Flame Adjustment
Correct burner cap placement and flame adjustment are crucial for the efficient and safe operation of your Kenmore 790 cooktop․ Always ensure that the burner caps are properly seated on their respective burner bases before operating any surface burner․ Misplaced caps can lead to uneven heating, poor ignition, or an improper flame pattern, potentially creating a hazardous situation․ Each cap is designed to fit snugly, often with a small locator pin or notch to guide alignment․ A common issue is the cap being slightly askew, which can block gas flow or affect the igniter’s spark․
Once the caps are correctly positioned, you may need to adjust the burner flame for optimal performance․ The ideal flame for natural gas or LP gas is steady, blue, and extends only slightly beyond the burner ports․ If the flame is yellow, noisy, or lifts off the burner, it indicates an improper air-to-gas mixture, requiring adjustment․ This adjustment typically involves a small screw located on the burner valve stem, accessible after removing the control knob․ Refer to your Kenmore 790 manual for specific instructions and diagrams for adjusting the low-flame setting on each surface burner․ Proper adjustment ensures even cooking and conserves energy, preventing soot buildup on cookware․
Cooking Functions and Techniques
The Kenmore 790 oven offers various cooking functions․ Master bake, timed bake, and convection bake for precise temperature adjustment․ Utilize broiling techniques with specific broiler settings․ The minute timer and general timer functionality ensure precise cooking․
Bake and Timed Bake Settings
The Kenmore Model 790 oven provides straightforward controls for its fundamental baking functions, ensuring consistent results for a wide array of recipes․ To initiate a standard bake cycle, users typically press the “Bake” pad on the control panel․ The oven’s display will then prompt for a desired temperature setting․ Adjusting the temperature is done using the appropriate up or down arrow pads, allowing precise control over the oven temperature for various dishes․ Once the temperature is confirmed, the oven will begin preheating; An indicator light or an audible signal will confirm when the set temperature has been reached, signaling the readiness for food placement․
For enhanced convenience, the “Timed Bake” setting allows for pre-programmed cooking durations; This feature is particularly useful for dishes that require a specific cooking time, after which the oven will automatically turn off․ To utilize timed bake, first select the “Bake” function and set the desired temperature․ Following this, the “Timed Bake” or similar button is pressed․ The display will then allow entry of the cooking duration, typically in hours and minutes․ Once the time is entered and confirmed, the oven will operate for the specified period, then automatically shut down, preventing overcooking and offering peace of mind․ This integration of precise temperature and time control makes the Kenmore 790 a reliable tool for everyday baking needs․
Convection Bake and Temperature Adjustment
The Kenmore Model 790 oven offers a Convection Bake feature, designed for more even heat distribution and faster cooking times․ Unlike traditional baking, convection utilizes a fan to circulate hot air uniformly throughout the oven cavity, ensuring consistent results, especially when baking multiple items or larger dishes․ This method often eliminates the need to rotate pans, contributing to a more efficient cooking process․
To activate Convection Bake, locate and press the dedicated “Convection Bake” pad on your control panel․ The oven display will typically show a default temperature or prompt you to enter one․ A crucial aspect of using convection is temperature adjustment․ Many recipes designed for conventional ovens require a slight reduction in temperature when using convection․ Generally, it’s recommended to lower the temperature by 25°F (about 15°C) from the standard recipe setting․ Use the oven’s temperature control pads to set the desired lower temperature․ The display will confirm your chosen setting․ This precise temperature adjustment, combined with circulating hot air, optimizes the baking environment for pastries, cookies, and roasted items, achieving superior browning and texture․ Always monitor your food, as cooking times can also be reduced with convection baking․
Broiling Techniques and Broiler Settings
The Kenmore Model 790 oven’s broiling function provides intense, direct heat from above, ideal for quickly searing meats, browning the tops of casseroles, or toasting bread․ To activate the broiler, select the “Broil” setting on your oven control panel․ Depending on your specific 790 model, you might have options for “Hi” or “Lo” broil, or even precise temperature settings for greater control over the intensity of the heat․ “Hi” broil is suitable for thinner cuts of meat or achieving a quick crisp, while “Lo” broil is better for thicker items that require more cooking time without burning the surface․
Effective broiling techniques involve proper rack positioning․ For thinner foods that need rapid searing, place the oven rack closer to the broiler element․ For thicker items, position the rack further away to allow for more even cooking throughout while still achieving a nice crust․ Always preheat the broiler for a few minutes before placing food inside to ensure the element is at full intensity․ It’s crucial to monitor food closely during broiling, as items can burn quickly due to the high heat․ Often, leaving the oven door slightly ajar is recommended to prevent the broiler from cycling off and to allow moisture to escape, enhancing crispiness․ Remember to use a broiler pan with a grid to allow fats to drain away, preventing smoke and flare-ups․
Timer Functionality and Minute Timer
The Kenmore Model 790 oven incorporates robust timer functionality, crucial for precise cooking and managing kitchen tasks․ Users can utilize two primary timer features: the Minute Timer and the Timed Bake/Cook function․ The Minute Timer operates independently of any cooking cycle, serving as a versatile kitchen timer․ To activate it, locate the “Timer” or “Minute Timer” pad on the control panel, press it, and then enter the desired duration using the numerical keypad․ Once set, the display will show the countdown, and an audible signal will sound when the time expires, reminding you to check your dish or perform another action․ This feature is perfect for tracking side dishes, marinating times, or simply as a general reminder․
In contrast, the Timed Bake or Timed Cook function is integrated with the oven’s cooking operations․ When setting a bake or cook cycle, you have the option to specify a cooking duration․ The oven will then automatically begin cooking and shut off once the set time elapses, ensuring your food is not overcooked․ To use this, select your desired cooking mode (e․g․, Bake), set the temperature, and then choose the “Timed Bake” or “Cook Time” option, entering the duration․ The oven display will show the remaining cooking time, providing clear visibility of your meal’s progress․ Both timers enhance convenience and accuracy in your culinary endeavors with the Kenmore 790․

Maintenance and Care Tips
Proper maintenance extends your Kenmore 790 oven’s life․ Regularly clean the cooktop and interior, addressing spills promptly; Consult the user manual for specific cleaning agents and techniques, ensuring optimal performance and efficiency․ Following these care tips is essential․
Oven Light Replacement Instructions
Replacing the oven light in your Kenmore Model 790 ensures clear visibility inside․ Always unplug the appliance or turn off the circuit breaker before starting to prevent electrical shock․ Safety is paramount during any maintenance task․
Locate the light cover inside the oven cavity․ This protective glass shield typically needs to be unscrewed counter-clockwise or unclipped․ Consult your specific Kenmore 790 Use & Care Manual (e․g․, Kenmore Oven 790․3017) for precise diagrams tailored to your model․ Carefully remove the old light bulb by unscrewing it․ Note the bulb type and wattage; using the correct, high-temperature-rated replacement is crucial for safe operation․ Appliance bulbs are designed for oven environments․
Insert the new oven-rated bulb, screwing it clockwise until snug, avoiding overtightening․ Securely fasten the glass light cover back in place, protecting the bulb․ Restore power to the oven․ Test the new light by opening the oven door or activating the oven light switch․ This simple replacement restores convenience for monitoring your dishes․
Troubleshooting Common Issues
Encountering problems with your Kenmore 790? This section guides you through common issues like a blank control panel after self-cleaning or sensor malfunctions․ Learn to diagnose and potentially resolve these frequent operational glitches using your Kenmore manual․
Diagnosing Control Panel and Sensor Problems
When your Kenmore 790 oven begins to act erratically, or simply ceases to function as expected, the control panel and oven sensor are often key areas for investigation․ A common complaint after engaging the self-cleaning cycle, for instance, is a completely blank or unresponsive control panel; This can indicate a problem with the control board itself, which manages all oven functions and displays․
To begin diagnosing a control panel issue, first ensure the oven has power․ Check circuit breakers if the display is entirely dark․ If power is present but the panel remains unresponsive or shows error codes, it might suggest a faulty control board․ Replacing the oven control board is a common repair, and instructional videos often provide step-by-step guidance for this process, highlighting the most frequent reasons for such a replacement․
Similarly, an inaccurate oven temperature or inconsistent heating often points to a malfunctioning oven sensor․ This critical component communicates temperature readings to the control board, ensuring precise cooking․ Symptoms of a faulty sensor include foods not cooking evenly, or the oven failing to reach the set temperature․ Instructional resources also exist for replacing the oven sensor on Kenmore electric ranges, detailing the typical causes for its failure․ Understanding these diagnostic steps can help pinpoint the problem before seeking professional assistance․